Hydro-Inertia Training: The Kamagon Ball + a Total Body Circuit Workout

Hydro Inertia Training w/ the Kamagon Ball + a Total Body Circuit Workout

This post is sponsored by Fit Approach on behalf of Hedstrom Fitness, makers of the Kamagon Ball.  While I was compensated for my time, the workout and all product opinions (as always!) are my own. After learning more about hydro-inertia training, I'm really excited to share this with you! 

HELLOOOOO BLOGOSPHERE!  It's been exactly 6 months since my last post here on the blog (more on that in an upcoming post), but I am alive, doing well, and ready to get into it with today's unique workout using hydro-inertia training! 

What is Hydro-Inertia Training?

Well, it's exactly as the name implies: you use a vessel filled with water as your resistance during your training, and the water's inertia creates an unstable resistance that's more challenging for your abs, core musculature, and overall stability.  I had the pleasure of testing out this Kamagon Ball recently, and wow, I can tell you that adding this piece of equipment to a workout creates a whole new experience!  All you do is fill it to the desired amount of weight (measured out in lbs on the side of the ball - see photo below), screw in the cap, and you're ready to go!

Kamagon Ball by Hedstrom Fitness

What are the benefits of Hydro-Inertia Training and using the Kamagon Ball?

Using an unstable resistance like water inside a ball creates a more functional training regimen as opposed to picking up a static weight or resistance band.  I'm quickly becoming a fan of it, and the Kamagon Ball, for many reasons:

  • Hydro-inertia with the Kamagon Ball creates instability within all ranges of motion instead of just postural
  • Functional training aspects: picking up children and animals isn't a stable motion, and neither is using the Kamagon Ball
  • Safer to use than most resistance training equipment: created with soft but durable plastic instead of metal (e.g. kettlebells, free weights, barbells, etc.)
  • Easily portable

As with any new piece of equipment, there will be drawbacks in addition to the benefits.  I only saw two minor drawbacks with the Kamagon Ball, though.  The first being that it's not easy to adjust the weight very quickly if you needed to like it is with a set of kettlebells or dumbbells (you'd have stop your workout to pour out water or add more to it).  The second drawback is that unless you're watering plants, refilling your dog's water bowl, or otherwise have a second purpose for the liquid after your workout, it seems like a waste of water to me.  But that's easily fixed with the previous suggestions.

Okay, enough details about the ball - onto the workout!  Let's get our bodies moving!

Kamagon Ball Total Body Circuit Workout | In Fitness and In Health

Kamagon Ball Total Body Circuit Workout

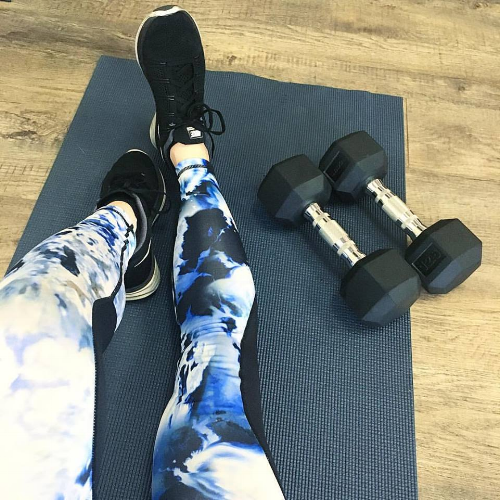
What You'll Need: an exercise mat and a Kamagon Ball filled with water to your desired weight (1-13 lbs for a 9" ball; 1-45lbs for a 14" ball - I have the 9" version and used 12lbs for this workout). Note: if you don't have a Kamagon, you can use a heavy dumbbell or kettlebell.
What You'll Do: start with circuit 1, do each exercise for 1 minute, cycling through 3 times, trying not to take breaks until the third round is done.  Repeat for circuits 2 and 3, resting only between circuits if you can.  Repeat the whole workout 2 or 3 more times depending on desired intensity.

Circuit 1: Legs & Butt

Squat to Overhead Press - start standing with your feet about hip width apart, holding the ball at chest level.  From here squat down, sitting back on your heels, and driving your butt back behind you.  Reverse the move back up to standing and as you stand, press the ball up overhead. Keep going for 1 minute.  Trainer Tip: if you want to challenge yourself here, you can isolate each leg and do single-leg squats with an overhead press.  If you do this, go for 30 seconds on each leg.

Jump Squats - start standing again with the ball overhead, as shown.  From here, jump your feet out wide and lower yourself down into a squat, reaching the ball down to the floor as you lower.  Immediately jump back up to standing, bringing your feet together, and pressing the ball up overhead again.  Continue for 1 minute.  Trainer Tip: for a lower intensity/lower impact option, get rid of the hop, and step your feet out wide into a squat and back in instead.

- repeat circuit 1 twice more -

Circuit 2: Arms & Back

Single-Arm Biceps Curls (30 seconds each arm) - in a standing position, hold one handle of the ball with your arm is straight.  From here, do a biceps curl, bringing the ball all the way up to your shoulder and right back down.  Remember to keep your elbow close to your ribs, your wrist neutral, and focus on only moving your forearm (not your shoulder joint).  Do 30 seconds on one arm, then switch to the other side.

Upright Row - start standing, feet hip width apart, slight hinge forward in the hips (as shown), with the ball lowered so your arms are straight.  From here, pull the ball up towards your sternum, focusing on squeezing your shoulder blades together at the top of the movement.  Continue for 1 minute, maintaining a neutral spine throughout.  Trainer Tip: if this one is a little too easy for you (it was for me), hold the squeeze at the top of the pull for 5 seconds before releasing.

- repeat circuit 2 twice more - 

Circuit 3: Abs & Core

V-up Crunches + Hold (30/30) - start lying down on your back, legs out straight, ball extended overhead.  From here, bring your feet and hands up at the same time to meet in the middle, forming a V with your body.  Try to keep your back flat during this (i.e. keep the spine straight).  Touch the ball to your shins, and lower back down slowly.  Continue the V-ups for 30 seconds, then hold the V-sit position for the last 30 seconds.  Trainer Tip: if the V position is too challenging, bend your knees slightly and touch the ball to the tops of your shins.

2-Pulse Slow Bicycles - these are like normal bicycles except we're slowing them down and adding a pulse between each.  So every time you bring that ball up to meet your knee, pulse once, then slowly reverse the move to the other side and pulse again (so the ball touches your knee twice on each side).  Don't rush these - I really want you to feel your abs working here!  Continue alternating pulses on each side for 1 minute.  Trainer Tip: try to keep your shoulder blades off the mat/floor as much as you can throughout the minute.

- repeat circuit 3 twice more -

Remember to keep the workout going for another full round or two if you want a more intense workout today!  (And once you're done - use the water to hydrate your plants, garden, lawn, refill that doggy bowl, etc.)  I hope you guys enjoyed it, and I really hope you'll give the Kamagon Ball a try this year!  It's definitely worth the investment (9" ball will run you $50), and I think hydro-inertia training is something you'll be hearing a lot about in the fitness world this year - it's a bandwagon to jump on!

To learn more about hydro-inertia training, and to purchase the Kamagon Ball, check out Hedstrom Fitness's website here.

Readers: chat with me!  Have you heard of hydro-inertia training before?  Have you ever used the Kamagon Ball or something similar in your workouts?  Do you think you'd give it a try?  I'd love to hear your thoughts, and of course what you all have been up to in recent months!

Upper Body + Cardio Circuit Workout (+ a $150 WishFIT GIVEAWAY!)

Upper Body + Cardio Circuit Workout | In Fitness and In Health

Hi everybody!  SUPER excited to get back to blogging today after a little hiatus, and not just back, but back with a great upper body workout and a HUGE GIVEAWAY!  

First, let's talk about the workout.  This one is all upper body focused (except one exercise that will work your back), and all you need is a stability ball.  I recommend choosing one that's medium sized for you - one that you can lay on top of with your hands and toes comfortably touch the ground, and where, if in a plank position with your legs on top of the ball, it lifts you to a height where your spine is in a straight line.  You'll be in a prone position for all exercises with the ball, and you'll alternate upper body exercises with... wait for it... burpees!  Not as enthusiastic about burpees as I am?  No worries.  There are modifications if you need them, and ways to progress the move if you choose to do so.  Ready to get started?

Upper Body + Cardio Circuit Workout | In Fitness and In Health

Upper Body + Cardio Circuit Workout

What You'll Need: a sturdy stability ball, a mat, and a timer.
What You'll Do: start with exercise 1 on the ball and stay on each exercise for 1 minute.  Go through 3 rounds total.  In each round, you'll add 5 burpees between every exercise.  So, for example, in round 1 you'll start with 5 burpees between moves.  Round 2 = 10 burpees between exercises, and round 3 you'll do 15.  The last round is meant to be challenging - push yourself and don't give up!

A note on burpees: the traditional burpee is done starting from a standing position, lowering into a squat, placing your hands down on the ground, jumping back into a plank, optional push up, and reverse the move back up to standing with an optional jump upwards.  Here are some ways to modify:

  • Modification: bend your knees into a squat position, place your hands on the ground, step back into a plank, optional push up if you want to, then step back up to starting position. Add the jump as you stand only if you want to.  This version is easier on the joints, and less cardio-heavy, but still keeps you moving.
  • Progression: move more quickly, adding the push up AS you jump your feet back into a plank, not afterwards.  To increase the cardio and leg work even more, add a tuck jump as you reverse the move back upwards.

Plank Walkout Push Ups - start in a plank position with your knees on top of the stability ball, legs straight, abs engaged.  Walk out on your hands to a push up position, allowing the ball to roll closer to your shins/ankles (the farther out you roll, the more your abs will engage).  Do 5 push ups here, then walk your hands back to starting position, keeping your feet up off the ground.  Keep going for 1 minute.

- Burpees (round 1 = 5; round 2 = 10; round 3 = 15) -

Alternating Birddog Plank Pulses (10 each side) - start with your lower abdomen/hips on the ball, right arm and left leg extended straight out.  Pulse your arm and leg for 10 reps, then immediately switch and pulse for 10 reps on the other side.  Keep alternating sides (10 reps each) for 1 minute.

- Burpees (round 1 = 5; round 2 = 10; round 3 = 15) -

Prone Triceps Lifts + Pulse (10/10) - start by lying on your stomach with the ball behind your back, arms extended straight back holding the ball between your palms.  From here, squeeze the ball keeping your arms straight to engage your triceps, and lift the ball up slightly off your back.  Lower back down.  Do 10 lifts, then keep the ball up and pulse for 10 reps, squeezing the ball between your hands the whole time.  Keep alternating 10 lifts and 10 pulses for 1 minute.

- Burpees (round 1 = 5; round 2 = 10; round 3 = 15) -

Reverse Hyperextensions - okay, so technically this last move works your erector spinae muscles and not your upper body, but we'll go with it and give your arms a break.  Start with the ball under your pelvis, hands flat on the floor, chest lowered slightly, and toes touching the floor if you can.  From here, lift your legs up straight as high as you can get them, ideally trying to get your thighs off the ball.  Lower back down to start, tap your toes to the floor (or lower down as much as you can), and raise back up again.  Keep the lifts going for 1 minute.

- Burpees (round 1 = 5; round 2 = 10; round 3 = 15) -

Repeat twice more, adding 5 more burpees to each round.  You got this!

And now that the workout is over... a little fun!

$150 WishFIT GIVEAWAY!!

$150 WishFIT Giveaway!

Okay, so you might have scrolled past that workout just to get to the giveaway details, and I don't blame you.  Guys, this giveaway is HUGE and I'm so excited to host it for you!  WishFIT is the gorgeous activewear line from the Australian-based boutique clothing company Wish, who so generously gifted me the leggings and tank I'm wearing in today's workout.  The leggings are a gorgeous abstract floral print, with a mesh insert at the back of the knee and a back zipper pocket.  Lovvvvve them!  I'm loving the tank too - lately I've been all about these low-armhole muscle tanks (anyone else digging these??).  This one fits so comfortably, and is made from really high quality material (not your typical thin cotton t-shirt fabric).  The stitching creates a subtle stripe pattern too, which adds a bit of flare to your basic black muscle tank.

WishFIT leggings
Laughing

Alright, onto the good stuff!  WishFIT is giving away $150 to one lucky blog reader so you can stock up on some awesome pieces to fuel your fashi-- ahem, fitness goals!  Check out their Instagram page to get inspired!  Details for entering the giveaway are below.  Winner will be chosen THIS FRIDAY, 8/19!  Good luck!  (In case anyone is wondering about shipping costs from Australia - they'll be covered!)  Also, don't forget to tell me how this workout goes for you!

Readers: chat with me!  Do you use stability balls in your training often?  What are your favorite exercises to do with them?  What do you look for in athletic apparel?  Have you jumped on the muscle tank trend? 

Whole Wheat Protein Banana Bread with Toasted Walnut Crust

Whole Wheat Protein Banana Bread w/ Toasted Walnut Crust

Banana bread has become somewhat of a snack staple in my life these days.  Probably because I usually buy bananas to have with breakfast and end up not eating them until it's too late (oops).  But they're perfect for making this deliciousness to keep on hand for a snack!  Anyone else have this problem?

Today's recipe comes from my mom's side of the family, passed down to her from her great-grandmother.  The original recipe is super delicious, but I've switched up a few of the ingredients to make it a bit healthier.  I swapped in agave for regular sugar, coconut oil for butter, and added in Bob's Red Mill Protein Powder for an extra protein punch and fiber boost.  I also topped it with walnuts and coconut flakes for an added crunch, but feel free to experiment - other awesome additions could be dark chocolate chips (a snack that doubles as dessert!), cranberries, chia seeds, you name it.  That's one thing I love about baked goods like this - you can add in whatever you want and it almost always turns out awesome!

Whole Wheat Protein Banana Bread w/ Toasted Walnut Crust

Whole Wheat Protein Banana Bread w/ Toasted Walnut Crust

Whole Wheat Protein Banana Bread w/ Toasted Walnut Crust

INGREDIENTS:

  • 2/3 cup agave (substitute for 1 cup sugar)
  • 1/2 cup coconut oil (substitute for 1/2 cup butter)
  • 2 eggs, beaten
  • 1 1/2 cups whole wheat pastry flour
  • 1/2 cup Bob's Red Mill protein powder (I used the unflavored protein & fiber nutritional booster, but you can use any flavor you'd like)
  • 1 tsp baking soda
  • 1/2 tsp salt
  • 1/2 cup sour milk (1 Tbsp apple cider vinegar + add milk to 1/2 cup line)
  • 2 ripe bananas, mashed
  • crushed walnuts (for topping)
  • unsweetened coconut flakes (for topping)

INSTRUCTIONS:

  • Preheat oven to 350˚
  • Spray loaf pan with non-stick baking spray
  • Mix all dry ingredients together in large bowl
  • In a separate small bowl, beat together agave, coconut oil, and eggs until just combined
  • Combine wet mixture with dry ingredients
  • Prepare sour milk and add in
  • Add mashed bananas and mix until all ingredients are combined
  • Pour into loaf pan and top with crushed walnuts & coconut flakes
  • Bake for 60 minutes or until knife/toothpick comes out clean
  • Enjoy!

Yum yum yum!  I hope you enjoy this recipe as much as I do!  AND - in case you missed it or need some inspiration for other healthy delicious snacks, check out these Chocolate Chai Protein Bites (inspired by one of my favorite drinks - the chocolate chai martini).  Enjoy and have a great rest of your weekend!

Readers: chat with me!  Do you bake banana bread often?  What healthy substitutes are you making in your baked goods?  Do you use protein powder often?  What are some of your favorite snacks to have on hand when life gets busy?